Wednesday, January 27, 2016

Valentine Starburst Plus Bonus

Hey crafty peeps! Since Valentine's Day is coming up in just a few short weeks, I need to make several card so that I can sent some out (hopefully they will actually make it to the mail lol) in enough time for the recipient to actually get it before Valentine's.  And, as a special treat, I have made two different cards to share with you today. 


Alright, for those of you that care (lol) the patterned papers came from an older paper pad from ???. The heart trim in the center was some that I found at Walmart and it was only a dollar, I LOVE it! I used Thickers from AC in the font Journal, one of my new favorites. Lastly, the hearts on the front were hand cut and the embossed with the Cuttlbug Swiss Dots embossing folder(my most used folder.)
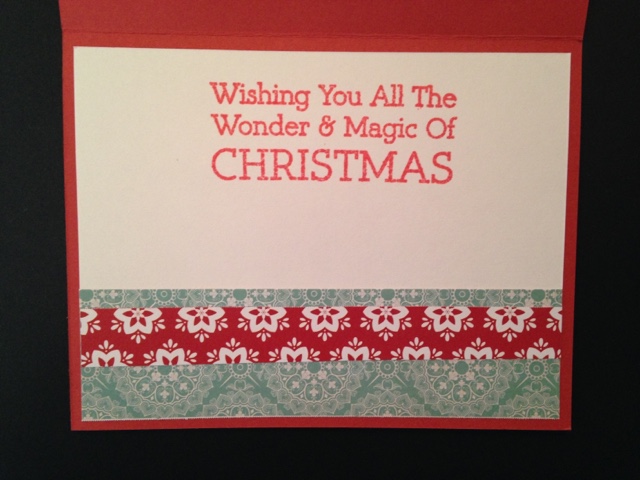
The inside I kept very simple. I added a leftover strip of patterned paper and accented it with a embossed heart from a Sizzix die. 


These are all similar as you can tell, just a difference in paper order and center embellishments. I included all of them so you could see that the design can be adapted for multiple uses. The papers are from a new 2016 Recollections Valentine's paper pad. (The cut aparts came fome a Pebbles paper pad)

Monday, January 25, 2016

Christmas 2015 Cards- Final

Hey my crafty peeps! I bet you all I forgot to do my posting for today, and you would be correct LOL. I remembered it this morning around 7 AM but got sidetracked working on another project (I'm re-organizing my die storage and is taking 1 million times longer than I thought it would). And about five minutes ago I looked at the clock and realize what time and day it was. Hey at least I remembered and I didn't break my streak, that's more than I can say for the stupid diet (which still hasn't managed to make it past a day).

Now if you're like me you're getting a little bit tired of still seeing all of the Christmas cards, well you're in luck because I decided that today will be the last day. Now this post might be full of more pictures but if that's what it takes to get it completed so that we can celebrate February by moving on, then I think it's worth it.

So that's first this up into two categories, the first of which is ornaments: 


This card was super simple and I made it at the last minute, but the simplicity of it made it one of my favorites.


Send shaker cards and very much the thing right now, I just had to include one in my Christmas card stash (I should've done a better job hiding the foam tape though LOL)


If you notice the ornaments from this card are actually the punched out pieces from the previous card (the shaker one) and I didn't want to see them go to waste. This is a great way to use up your scraps.


This card was simple and I just used a couple of stamps and my Bic Mark It Up markers. I also used a little bit of embossing powder to make the words sparkle and shine, and a couple of metallic markers for the ornaments on the front (even though they didn't turn out like to help they would)

This concludes the end of the ornament section. Only a few cards left to show and none of them really fit into a category. So I'm simply titling this category Other (I know unique right lol)


These cards are very similar, but this past year I simply fell in love with this starburst design. I have used it multiple times for many different styles of cards. This card also allowed me to use some of my stickers (of which I have way too many.) 


Now this card is actually one of my absolute favorites. It's just a simple stamped image colored in with my Bic Mark It Up markers. I added a little bit of Stickles so that the "snow" would sparkle. Let's face it what's cuter than a polar bears and penguins? 


This is a guys, the final card in the Christmas 2015 cards series. And, it features a darn cat. Now if you know me you'll know that I am definitely a dog person but these images were just too cute to resist. Oh, and sorry I forgot to take a picture before I wrote on the inside.

Well, that's it guysI hope you enjoyed all of my Christmas cards and look forward to next week when we can finally get out of the Christmas season and into something new (I just wish I knew what I was gonna post lol)

Saturday, January 23, 2016

Superhero Layout

Hey peeps! To start off today's post I want to make two apologies. 

The first, is that I am sorry my previous posts this week have been so short. For some reason this week I have been feeling majorly uninspired and living too much in my head, which makes for bad blog posts. I recently received my first bit of constructive criticism about my blog posts, I was told that at times it reads as dry and boring – I need to add more of my own personality into each post. Of course this has led me to overthink every word that I write and question whether or not I'm being funny. I've come to the realization that I must be "accidentally funny" because when I try it comes off as forced an unbelieveing. So I now have something (else) to work on. 

The second apology that I need to make is that this post is a day late, I had it done in plenty of time to upload but last night I suffered from a major headache and actually went to bed really early. I don't know if it was due to my "lack of sleep" the night before (I went to bed, woke up two hours later and couldn't get back to sleep, I have sleeping issues – don't judge lol) or if it was the fact that my back has been hurting and I'm too chicken to get a massage or to see chiropractor. I hope you all can forgive me. 

Now enough of this rambling, let's get to the layout. As the title says this week is a superhero themed double page layout. Last June, my niece celebrated her fourth birthday with a superhero themed party. She absolutely loves Wonder Woman and looked adorable in her costume. I went through the photos that I had from the party and I knew that I wanted to put a lot of them on this layout. That is why this layout features six 4 x 6 photo mats and one 4 x 4.


Since I wanted the focus of this layout to be about the pictures I tried to keep the design pretty minimal. I used to Cricut Plantin Schoolbook to cut the cityscape (this is one of my favorite cuts from the entire cartridge, I've used it many times) and I cut it using the "fit to page" feature on my expression. Even at the maximum size the city will not cut the entire length that you will need it, it is about a quarter of an inch short. I'll tell you how I fix this problem soon. 

I used the Cricut Create a Friend cartridge to cut my super hero girl. The actual cut is a Super boy but because so many elements of this cartridge are interchangeable I was able to simply find another hairstyle and turned the boy hero into a girl hero. I cut her out at 6 inches so that she could be the major focal point of the page. Just a little sidenote, if you're familiar with the cartridge you'll know that I added a little red piece around the neck to simulate the tie from the Cape, not only does it add a little bit of uniqueness to the character but it was also to hide one of my own mistakes. As I was adding glue to the body during assembly I almost tore our hero's neck off and didn't want to recut the entire thing. So by cutting a tiny piece of red card stock and adding it to that area I was able to mask the fact that I almost decapitated my focal point.

Now, since the birthday girl dressed as Wonder Woman, I wanted to stick with those colors throughout the layout (Plus, most superheroes share the same color combos anyway – red, white, blue and gold). The pattern papers actually came from a patriotic themed paper pad from Pebbles called Americana. Although you can't see it very well, there is a piece of gold(ish) cardstock that separates the red and blue pattern papers and it is punched using the Fiskar's Upper Crest border punch. I did this to mimic wonder woman costume which is a red top, a blue skirt and a golden belt. 

I mentioned above that the cityscape cuts just shy of the length that you need it, to solve this problem I grabbed a punch from American Crafts called Scalloped Star (it is one of the knockout punches and a part of a Christmas set of six different punches – I got it on sale at Tuesday Morning a while ago ) and I added it to the edges to cover the gap. 

To finish up the page I went through my bin of Thickers and other alphas (man is that bin scary, I just may have too many alphabet stickers LOL, but you just have to have one in every color right?) and i found that I had the same font (freedom-which is kind of fitting if you think about it) in both a red and a blue. 

Lastly, because I hate blank space, I went into my sticker/die-cut/other randomness bin and found a package of superhero themed diecuts from Recollection. I cut apart one of the frames in the pack to get the sentiment "Super Hero" and added it to a red "burst" that was also included. 

I hope you all like it and found this post to be both informative and "less dry and boring". If you have any feedback I would love for you to tell me by posting in the comments. I hope you have a fantastic weekend and I will see you back Monday with the conclusion to our Christmas 2015 card flashback. 


Wednesday, January 20, 2016

Simple Balloon Card

Hey guys. This weeks card is a simple birthday card that I made for my niece who turns one on Saturday.

A quick side note, why is it that when you NEED to make a card for a specific occasion you experience the biggest creative block lol. Am I the only one that this happens to? 

Anyway on with the card:

As I said I kept it pretty simple and grabbed a couple of dies. 

For the supplies I used:
Paper pad called Fine and Dandy by Dear Lizzy/American Crafts
Spellbinders die Labels Four (I used the largest one)
Balloons dies are from Paper Smooches

I'm pretty happy with how it turned out and I hope you guys like it a please comment. 

Monday, January 18, 2016

Christmas 2015 cards week 3

Hey guys I'm back with more Christmas cards and this week they all feature trees. Simple and classic. 


I'll see you all Wednesday with a new card. 

Friday, January 15, 2016

Sweet Memories Layout

Hey peeps, it's finally Friday! That means it's time for another scrapbook layout. Before we dive in to the project for this week let me first tell you about the epiphany I had about an hour ago. Are you ready for it? Just because I upload a project for a specific day does NOT mean that the entire project must be completed solely on that day. I know most of you probably realize this along time ago, I guess I'm a little slow. But, as I was ripping my hair out trying to finish this layout in time to upload it for the Friday layout day I realized that maybe I should've actually started working on it before 3 PM today LOL. Hey will learn something new every day (even if it's something we should've learned a long time ago). 

For this weeks layout I once again was inspired by something I found on Pinterest (Man I love that website and app). Instead of putting the direct link here on my blog, I have it saved on my scrapbooks board on Pinterest, you can find me under Ashley Jestes. 


I am truly in love with this weeks layout! It has a boatload of candy what more could a girl ask for! For this layout I used primarily the Cricut Lite Sweet Shop cartridge, one of my personal favorites because it is loaded with sweet treats. The clouds once again came from my favorite Fiskar's punch, I have it in three different sizes (I believe they are medium, large and extra-large). For the title I used a phrase from the Winter Frolic cartridge, because I felt like it best describes the layout, and it is something anyone can use for just about any picture.

I hope you all like the layout just as much as I do! And I will see you back on Monday to continue with part three in the Christmas cards of 2015 series. And I give myself some homework for next week, Start my darn layouts earlier than Friday afternoon!

If you have any questions or comments please feel free to post them. I love hearing people's thoughts. 


Wednesday, January 13, 2016

Create A Card Wednesday- Simple and Quick

Hey peeps, today I decided to keep it super simple and easy. When I was at Michael's over the summer I bought some premade cards and cupcake embellishments from the clearance aisle for really inexpensive. I'm not in the habit of buying pre-folded cards (mostly because I think it is a waste of money when I already have invested in pattern and solid cards stocks). But, if they're really inexpensive sometimes I will go ahead and buy them  if I have an idea for them. That is why I went ahead and bought these cards, because during the same trip I saw a package of different colored cupcakes (also on clearance) and I knew I wanted to use the two together.


I kept the inside very clean and simple, leaving plenty of room to write a message. The cards came in a pack of 12 and I bought four packages of the cupcakes, meaning I was able to create 12 different cards (and still had a few cupcakes stickers left). My birthday stash thanked me, since it was majorly depleted from Last year. 

I hope you all have a great day and I will see you back on Friday for a new scrapbook of layout.


Monday, January 11, 2016

Flashback Monday- Christmas Cards take 2

Hey peeps I'm back with some more picture of the Christmas cards I made for 2015. 

Today's pics all feature one of my favorite wintery icons: SNOWMEN!!! I don't know what it is about this fat little guys packed with snow but they fill my heart with joy. 

So without further ado let's get this runway show started. 


(It's so cold I'm shaking- on an action wobble)


So who wins this round of Project Snowman? (This is supposed to be a play off of Project Runway, but even as I write it I'm thinking its a little lame. 

Well I will see you on Wednesday for an all new card.